
Introduction
Intel® XDK allows developers to build Web and Hybrid apps using web technologies HTML5, JavaScript, and CSS3 for multiple platforms. Developers can write one app that can run cross-platform and on mobile devices with no modification. Intel® XDK supports all major target platforms - Microsoft Windows*, OS X* and Ubuntu* Linux*. The tool provides developers a complete workflow for developing, debugging, testing and deploying their apps on the target platform based devices.
Intel® XDK allows developers to build Web and Hybrid apps using web technologies HTML5, JavaScript, and CSS3 for multiple platforms. Developers can write one app that can run cross-platform and on mobile devices with no modification. Intel® XDK supports all major target platforms - Microsoft Windows*, OS X* and Ubuntu* Linux*. The tool provides developers a complete workflow for developing, debugging, testing and deploying their apps on the target platform based devices.
Intel® XDK is a great tool for beginners and experienced developers alike, and provides a simplified workflow to enable developers to easily design, build, and deploy Web and Hybrid apps across multiple app stores and form factor devices. Developers can either start with a blank project, or work with an existing demo or other templates. Editing is supported via the open source HTML5 Brackets* editor. The HTML5 Brackets* editor provides several convenient features like auto completion and provides all relevant development lifecycle tools for developing, debugging, building and testing apps.
This document demonstrates users how to create a native Web application using HTML5, JavaScript and CSS3 for new users. It will outline how to install the Intel® XDK, create a simple log-in form project, style it, and test it on the emulator.
The code developed for this article will be used in the future to provide web based access to the resources used in the Restaurant app referred to in several articles from other team members.
Some references to those articles are:
1. Adding Search Capabilities
2. Using a Database With Your Android* App
3. Developing Android* Business Apps Using NFC Host-based Card Emulation Capabilities
Intel® XDK Installation
2. Using a Database With Your Android* App
3. Developing Android* Business Apps Using NFC Host-based Card Emulation Capabilities
Intel® XDK Installation
Download and install the latest version of the Intel® XDK at http://xdk-software.intel.com. The tool is provided free of charge. You will need to create an Intel® XDK account to launch and test your app on a real device. For a tutorial on how to run the app on a real device, visit Get Started with the Intel® XDK. An account is not required if you are using the emulator from the Intel® XDK to test your app.
Create a Blank Project
Create a Blank Project
You can start a project using the templates, demo or a blank project. The tool includes a streamlined workflow, which guides developers through the development, testing, debugging and deployment phases of app development. The text editor on the “Develop” tab is based on the Brackets* editor, where you edit your app. Intel® XDK documentation has detailed instructions on how to use each tab of the workflow.
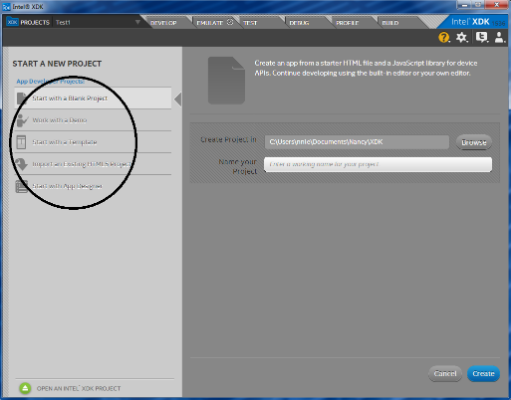
Figure 1: Starting a new project
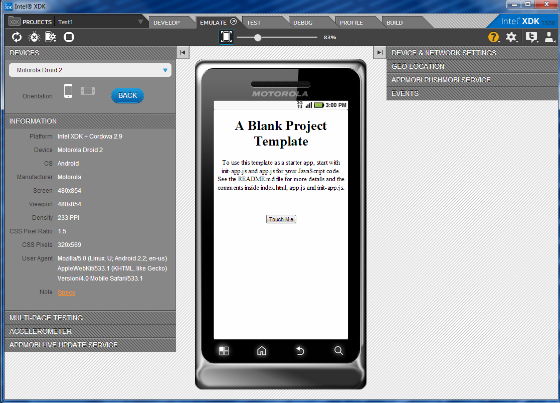
Figure 2: Creating a blank project
Create a Log-in Form using HTML5, JavaScript and CSS3
You are now ready to edit your index.html to create the log-in form. First, you need to start with an opening form element tag. The input type for user name and pass word are text with placeholder. Placeholder describes the expected value of the input field.
01 <form action="" method="post" name="login" class="little-chef-form">
02 <label>
03 <span>Username:</span>
04 <input type="text" name="username" placeholder="Username" id="username" />
05 </label>
06
07 <label>
08 <span>Password:</span>
09 <input type="password" name="password" placeholder="Password" /
10 </label>
11</form>

The next input type is button. Once the user clicks the log-in button, JavaScript validateForm() will be invoked to validate the log-in form. You can use HTML5 to validate the log-in form but it is better to use JavaScript since some of the HTML5 attributes are limited to the latest browsers.
1<label>
2 <span> </span>
3 <input type="button" class="button" value="Login" onclick="return validateForm()" />
4 </label>
Here is an example of using JavaScript to validate the form. A JavaScript file must be saved with the .js extension.
01 function validateForm() {
01 function validateForm() {
02 var formUsername = document.forms.login.username.value;
03 var formPassword = document.forms.login.password.value;
04
05 // Validate username and password
06 if (formUsername === null || formUsername === "") {
07 alert("Username must be filled out");
08 }
09 else if (formPassword === null || formPassword === "") {
10 alert("Password must be filled out");
11 }
12 else if (formUsername.length < MINLENGTH || formPassword.length < MINLENGTH) {
13 alert("The minimum length of username and password at least " + MINLENGTH);
14 }
15 else {
16 // Call api function to check whether the username and password exist in the server
17 return;
18 }
19 alert("Login failed!!!");
20 }
If the user failed to log in, clear the form and give the user number of time to try. If the user successfully logged in, clear and disable the form as below.
01 function clearAndDisableForm(form) {
02 if (form == formType.LOGIN_FORM) {
03 // Clear the form
04 document.forms.login.username.value = '';
05 document.forms.login.password.value = '';
06 // Diabled the form
07 document.forms.login.username.disabled = true;
08 document.forms.login.password.disabled = true;
09 }
10}
Link to an external script file “js/Login.js” using script tag and the source attribute from index.html.
1 <script src="js/Login.js" type="text/javascript"></script>
A complete example of a HTML5 log-in form is shown below:
01 <html>
A complete example of a HTML5 log-in form is shown below:
01 <html>
02 <head>
03 <meta charset="utf-8">
04 <link rel="stylesheet" type="text/css" href="styles.css" media="screen" />
05
06 <title>Little Chef Login</title>
07 <script src="js/Login.js" type="text/javascript"></script>
08 </head>
09
10 <body>
11 <form action="" method="post" name="login" class="little-chef-frm">
12 <h1>Little Chef Log in
13 <span>Please login or sellect other options </span>
14 </h1>
15 <label>
16 <span>Username:</span>
17 <input type="text" name="username" placeholder="Username" id="username" autofocus required />
18 </label>
19
20 <label>
21 <span>Password:</span>
22 <input type="password" name="password" placeholder="Password" />
23 </label>
24
25 <label>
26 <span> </span>
27 <input type="button" class="button" value="Login" onclick="return validateForm()" />
28 </label>
29
30 <label>
31 <span> </span
32 <input type="button" class="button" value="Reset Password" onclick
33</label>
34
35 <label>
36 <span> </span>
37<input type="button" class="button" value="Register New User" onclick="return registerNewUser()" />
38 </label>
39 </form>
40
41 <table id="myTable"></table>
42 </body>
43 </html>
To style the way the log-in form looks, use CSS3. The most common ways of inserting a style sheet are external, internal and inline. An external style sheet is ideal to style many web pages. Each page must include a link to the style sheet with the <link> tag inside the head section.
1 <head>
2 <link rel="stylesheet" type="text/css" href="styles.css" media="screen" />
3 </head>
To add a 1 pixel light gray border around the input text and input password fields, use “border: 1px solid #CCC“. With six-digit hexadecimal color values, you can style the color of the text, background, and the border. Default value is #000000. You can also use color names such as red, green, and blue and more, or the HTML color picker. One way to use pixel to specify the width of the field is “line-height:15px”. It also specifies the space between the lines in two paragraphs. With “margin-bottom: 16px” you can change the bottom margin of the field. Similarly, margin-right and margin-top will define the right and the top margin of the field.
01 little-chef-form input[type="text"], .little-chef-form input[type="password"], .little-chef-form select{
02 border: 1px solid #CCC;
03 color: #888;
04 background-color: #000000
05
06 line-height:15px;
07 margin-bottom: 16px;
08 margin-right: 6px;
09 margin-top: 2px;
10 }
The example below styles the way the button looks. It specifies the background color, button text color, and the border. To style the shape of the button, use border-radius. “padding: 4px 25px 4px 25px” will specify the size of the button.
1.little-chef-form .button {
2 background: #EEE;
3 border: 1px solid #DDD;
4 padding: 4px 25px 4px 25px;
5 color: #333;
6 border-radius: 4px;
7 }
Test in the Emulator
The Emulate tab is used to test the functionality and layout of your app on a collection of virtual mobile devices. The default is Motorola Droid 2 with Android based devices.
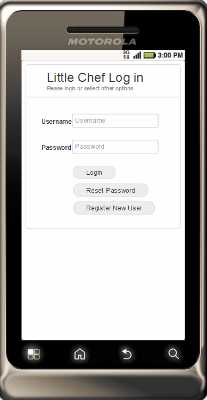
Figure 4: Log-in form in Emulator
After successfully creating a log-in form and testing it on the emulator, you can try to create the reset password and new user registration form.
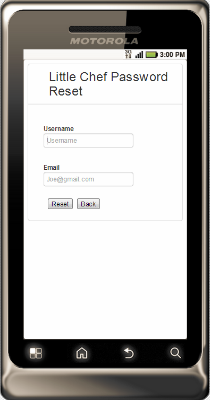
Figure 5: Password reset
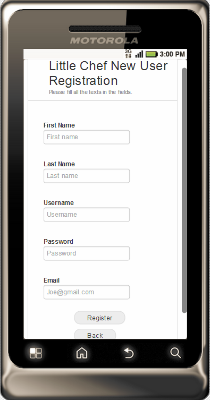
Figure 6: New user registration
Summary
Intel® XDK is an integrated front-to-back HTML cross platform app development tool. The various tabs at the top guide the developers easily through the various development tasks. The tool makes it very easy for developers to develop and deploy their applications to one or multiple supported app stores. This document also demonstrates to new users how to use Intel® XDK to create a native Web application.
For more such Android resources and tools from Intel, please visit the Intel® Developer Zone
Source: https://software.intel.com/en-us/articles/html5-web-app-using-intel-xdk
No comments:
Post a Comment